Digital Image Copyright Protection

The internet might have started out as a text-based system but for most people it’s now fast and reliable enough that digital images have become an important part of the online experience. In fact for many images are what they use the web for most – photographers, designers and others display, advertise and distribute their work online. This usually works very well, because it’s cheap, simple and lets you show your images to a huge audience. There’s one big drawback though – anyone can copy your images, use them for whatever they want or even claim them as their own. Sometimes that’s okay under “fair use” laws, but usually it’s theft of intellectual property and it’s illegal. The best way to defend your rights to your work is to understand and use the copyright laws, and make good use of technology to apply them to your work.

In the USA and any other country where the Berne Convention applies copyright is automatic – you don’t need to apply for it. However if you find someone using your work without permission your copyright may need to be proved. One of the easiest ways of doing this is to simply add a digital stamp to your images when you create them, including the © symbol, your name and the date the work was created. Any image editing app can be used to do this – just make sure you “flatten” the image before distributing it, as if you leave the copyright stamp in a separate layer it may be possible for others to edit it without leaving evidence. An even more effective method is to incorporate a watermark into free versions of the image, ideally including the same copyright information. This way, if people like the image and want to obtain a non-watermarked version they can buy one from you. At the same time if anyone uses a free version it will be obvious from the watermark that they haven’t paid for it. Most watermarks are clearly visible, but others are not obvious to the naked eye; someone using the image without permission might not even know it’s there, but the creator will and can prove it.

Digital images allow meta information to be embedded in various ways. This can also be valuable in proving ownership or in complying with license conditions. For example popular web content systems like WordPress allow users to add various comments to images, including attribution of the work to the original creator.

A recent innovation is the use of Creative Commons licenses. Creative Commons is a nonprofit which has developed a series of licenses based on US copyright law. The benefit of these is they are recognized by many image sites, such as Flickr, and give the creator a lot of control over how their work is used. For example a license can be created that allows others to use the work on condition they attribute it properly to the creator, or authorizes use only for noncommercial purposes.

At first glance copyright law can seem complex, but if you’ve put time and effort into creating images you have a right to control how they’re used and to decide who profits from them. The basic steps above will let you set the conditions for use of your work, prove your copyright over it and demonstrate whether use is authorized or not. For the sake of a few minutes at the end of the creation process it makes no sense not to add all the protection you can.

Best Image Editing Software List

As a photographer you need to equip yourself with knowledge on how to use different best image editing software. This is necessary for you to be able to come up with the best images which your clients will appreciate paying for. There are many software available which will allow you access different features which will make you enjoy your photography work.

Image editing has become a necessary skill to all types of businesses.  Here we have an example of a pixelated arborvitae tree courtesy of www.thetreecenter.com.  Even a plant business such as this needs editing software if they intend on having an online presence in the tree industry.

Pixelated-Tree


Before you decide on any software you need to take your time and asses the suitability of the software. The software should also be easy for you to use so that you will avoid errors when making use of it. The software can be hard for you to understand on how to make use of it, but after you take an initiative and carry out your research online you will easily access necessary information which will enable you handle different software easily. The following are the best image editing software that you can try:

1. Adobe Photoshop

This is the most advanced software that you can use to edit images. The software has a lot of features which you can use to achieve complex features on your images. The software has a complex user interface which requires someone with enough knowledge on how to make use of it so that the person will achieve in making use of it. With the software in case you know how to make use of it, you can achieve to come up with different designs no matter how complicated they are. In case you will like to make use of the software you need to make a habit of practicing it where you will gain experience with time for you to start enjoying it.

2. Adobe light room

The software is a bit different from other photo editing tools where it works by employing an integrated workflow which allows the users to manage, import, edit and share photos. The software enables users to edit images while it maintains the original image properties. This makes it possible for the users to go back after they have edited the image. For example you may do some editing on an image but later you discover that the editing features that you have employed are not the best. With adobe light room you can just go back by undoing the editing options that you may have carried out on the image. This has made many people prefer making use of the software.

Continue reading

Optimizing Images Without Sacrificing Quality

Broadband Internet is now available in many parts of the world, and its usage is taken for granted. Therefore, image optimization doesn’t seem have the same importance as before. But why waste time and resources when it’s possible to reduce the image size without losing quality.

Why image optimization is so important?

Most customers wait about 2-3 seconds for a site to load on their desktop or laptop.

…and about 5 seconds on their mobile device.

Amazon and Walmart found that if their pages slow down by even 2 second, they lose $1.7-2.6 billion a year!

Google now uses page load time as an important factor in their ranking algorithm.

If you have images that slowly “drool” down the screen and take over 20 seconds to load – well, you can be sure that most of your prospective customer will move on to the next website for business!

Photographs constitute an important part of most websites and on average take about half or one-third of its “weight”. Aside from their quality, it’s also important that they are properly optimized. Image optimization can be viewed from two aspects; the first aspect is the file size and loading speed of each image, while the second aspect includes proper naming and optimization of image files for search engines.

If it take too long for a site to load, it’s likely that photos used on the site are not properly optimized. This may result in a slow website that may rank low on search engines. These days, millions also access Internet on their mobile devices which means slower downloading speeds and limitations on data, which is another valid reason for proper image optimization if you want greater online visibility and more customers.

Photos clicked by a camera are of high resolution (i.e 3456 x 2304 px). They are large files that might be suitable for printing but would take minutes to load. Therefore, first step in image optimization is to resize the image to a smaller resolution. It’s not necessary to be an expert programmer to do that as there are many programmers such as Gimp and Photoshop that can do this for you. You need to buy few of them while others are free.

So what are your options?

If you have more images on your website, you can consider reducing the size of your image files. This will immediately increase pageload speed leading to more visitors and more business. Less visitors who visit your site will click away.

You can reduce your image file size in Photoshop by using the “Save for Web” command. When you’re using this command, you can adjust the image to its lowest acceptable file size while keeping any eye on its quality.

Continue reading

Compressing Images To Save File Size

The present era is the era of digitization. As such the photos that we see in various websites and blogs are generally high quality digital pictures. But most of the websites, blogs and email service providers restrict you to upload or send large images. So, compressing images to save file size has become a mandatory requirement for every one of us. The reason behind this is whenever you click a digital picture the size of the image shows very large. As such they cannot be used in websites in its original file size. Well, there are various approaches that you can adopt to compress your image file size, but before you go for any particular approach you need to be aware of the final outcome.

The compressing of your image can be done in two different ways. The first one is Lossy compression and second one is Lossless compression. In Lossy compress method, the original image will get compressed but some information like fine details and minute color degradation will be lost in this approach but they are almost non identical. On the contrary, in Lossless compression method your image file size will get reduced without compromising with any details of the image. You can go for any one these methods to compress your image file size based on your requirements. Normally, most of the browsers support JIF,JPEG, PNG image file formats and each of these formats supports either Lossy or Lossless compression method.

The details about the different image file format and different approach to compress these image file are mentioned below. Go through them and you will get a clear idea about compressing images to save file size.

GIF

GIF stands for Graphics Interchange Format and it is the oldest type of file format and is accepted by almost all browsers. It supports 8 bit images and allows maximum of 256 colors. If you don’t want to compromise with the quality of your image and want to get the original image even after compressing it then you need to save your file with extension Gif. This is because Gif supports Lossless method of compression which keeps the original image even after compressing the image file size. But when you save your image in Photoshop using interlaced option then after uploading it in the websites, at first it will show a bit faded image but slowly the original image will get displayed. The other option that you can go for is non-interlaced in Photoshop. Here you will only see a red X initially after uploading the image and you can see the full image only after the entire image gets downloaded. The only problem with interlaced is that it slightly raises the image file size. GIF is highly advisable for images like flat-color, text or sharp edged images. Most of the people are very particular about sharpness of the image. So for them GIF is the ideal choice.

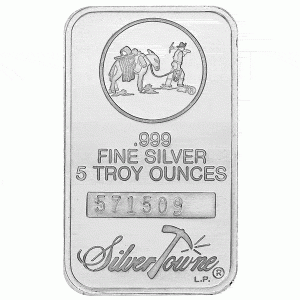
Golden Eagle is an online retailer of precious metals.  This is a great place to buy silver coins & bars.  We worked with them recently to optimize some of their images.  Since silver is largely black and whites & greys, there is a lot you can do as far as optimizing the file sizes to save bandwidth.  Here is an example of one of their silver bars in which we optimized the image to save file size.

Silver-Bar

PNG

PNG stands for Portable Network Graphic and it follows Lossless algorithm. This means no compromise with the quality of the image. You can be sure to get the original image even after compression. PNG is technically a replacement for GIF and it has all the characteristics just like GIF except animation. PNG has addition features which are not seen in GIF. For instance, it has error detection facility and it also supports true color along with alpha channel. PNG comes with two facilities. One is color masking and the other is alpha channel. PNG alpha channel helps to increase the glow of the image by hiding the unnecessary shadows created by the back ground. Well, all browsers do not support PNG but you can use PNG in your older version of browser with the help of plug-in. At last, keep in mind that PNG file are not zip able because they are already compressed.

JPEG

JPEG is not another image file format but it is a compression algorithm and it supports Lossy algorithm. This means minute details about the image will be missing in the compressed image file. JPEG is specially designed to satisfy the needs of different types of users according to their need. You will not be asked to compress your image under fixed size whereas you will be given flexibility to choose your desired compressed image file size. This method lowers the size of the image you want. But after compression the result will be degradation of quality, which means you can choose either quality or quantity. JPEG supports 24-bit color. JPEG can reduce the file size drastically. For example, if the file size is 900k, it can be reduced to 24 k. JPEG is not suitable for compressing flat colored or sharp images. In JPEG compression technique, the more you reduce the original size of the image there will be more degradation in quality in terms of color and sharpness of the image.

Article Resources 

The resources for the article are obtained from the following links given below:
http://en.wikipedia.org/wiki/Image_compression
http://www.wikihow.com/Compress-Photo-Files-With-Microsoft-Office-Picture-Manager
http://onlinesupport.conted.ox.ac.uk/TechnicalSupport/CompressingImagesToReduceFileSize.php


Summary

Well, you can go for any of the above mentioned approaches for compressing images to save file size. But, it is very important for you to keep in mind that each file format has their own limitations regarding image file compression. Hence, based on your requirements you can adopt any one of the approaches and can reduce your image file size according to your criteria.

With the given techniques of compressing images to save file size, you will no more face any problem to upload your desired image to your favorite web sites or blog or for sending images. The above file formats are supportive in all web browsers and you can see the images in the same form in lossless compression technique and with minor compromises in Lossy algorithm technique. So, before you go for compressing you image, be very clear about your requirement and purpose for compressing image and then accordingly take up any image file format. Hopefully, the given information has surely educated you in detail about the different image file formats and their specific characteristics.

Anatomy Of the Animated GIF

GIF is the standard format used for compressing images with crisp details and large areas of solid colors like those in logos, art, or type. Being an 8 bit-depth image format it would’ve disappeared from the web after the introduction of PNG and JPEG file formats, but GIF is still one of the most favored file formats thanks to its unique frame animation feature.

Being indexed color images, GIF file contains a limited palette that is saved simultaneously with the image. The less color you use in your image, the smaller the size of the file will be. For that to happen with animated GIF’s, each frame in the file should use the same color pallete….so, if you’re varying the colors significantly from frame to frame, you’ll get a much larger file. Therefore, to limit the file size, you should try to limit colors as much as possible, and use same colors from frame to frame.

More information available here on creating an animated GIF in adobe photoshop

You can reduce the file size of GIF images by cutting down on the pixel dimensions. Cutting the number of frames in your animated GIF file will also reduce its size. GIG animations won’t work for large dimensions. Therefore, to keep the reasonable size for use on the Internet, you should limit the size of GIF animations to couple of hundred pixels.

Cool Animated GIF

Let’s have a close look at all available options for converting a video to GIF animation, and ways to optimize its file size. Let’s get started!

  • Trimming animation-You will need to open your video file with Photoshop. For GIF animation, you won’t need the whole sequence, so you can trim the video in the Timeline Panel. At this point turn on the loop option and find a good place to trim the video.
  • Reducing image size-Image size can be reduced from the Image menu. You can also do that later in “Save for Web” dialog box. It’s best if you do it in the beginning with Image Size Dialog Box as it will save considerable loading time when you open the Save for Web dialog box. You need to turn your video layer to a Smart Object if you want to resize your image, but don’t worry, this won’t affect your workflow at all.
  • Save for web-The best thing about this workflow is that you don’t have to do any conversion on the Timeline panel so as to save a frame animation, because Save for Web dialog box will do this work for you once you choose the GIF file format as your output. Keep in mind that animation options will appear on the bottom right corner of the dialog box. If you want to further reduce the size of your GIF image, you can still do that here.
  • Reducing the amount of frames-You can also further reduce the size of your GIF animation if reopen the exported file back into the Photoshop and delete each of its second or third frame from the Timeline Panel. Then select all the remaining frames and slightly increase their duration to compensate for any loss of frames. If this compensation is not done, then your animation will play faster than original. Once you’re ready, you can save this new version, which will be much smaller than the original one.
  • Number of colors-The best option here is to optimize the size of GIF file is the number of colors used in the Color Table. The maximum number is 256, which comes with the 8-bot depth limitation. Usually, it’s best to stick with 64 colors or less, but depending on your original video you might have to increase the number of colors to get much better results.
  • Choosing the best color reduction algorithm-Perceptual is best to create a custom color table by using colors for which human eye has greater sensitivity.

Adaptive is best to create a custom color table by sampling various colors from the spectrum that appear most commonly in the image. For instance, an image with the shades of blue or green produces color table made primarily of blues and greens. Most of the images concentrate colors in a specific area of the spectrum.

Selective would work best if you want to create a color table similar to Perceptual color table, but for preserving Web colors and for favoring broad areas of colors. Usually this color table produces images with the greatest color integrity.

Continue reading

Types Of Digital Image Files

There are different types of digital image file that are used to encode digital images. Some of them include JPG, TIFF, GIF, PNG and BMP. These file types are very important especially during compression. This is the term used when describing ways of cutting the size of the file. You may get some images that are extremely large and this implies that there will be more disk usage and slower downloads.
Furthermore, images could differ in terms of colors they contain. For instance, if an image has few colors, a file type can be designed to exploit this as a way of reducing the file size. However, you can get those simpler images with only two colors like black and white. Such images will only need one bit to represent each pixel.

Common Image Formats

Common file types

TIFF – This is a very flexible format which can either be lossless or lossy. A lossless compression will discard not even single information regarding the image. It is the most efficient way of presenting an image without compromising accuracy. On the other hand, a lossy algorithm allows some loss of information on the image in order to achieve its smaller size. In most case, this file type is used a lossless image storage format which does not use compression completely. Almost all the graphics that use this file type do not compression and as a result, their images are quite large.

PNG – PNG is a lossless storage format but contrast with common TIFF usage. In simple terms, it looks for some specific patterns in the image which it uses to compress the size of the file. Most importantly, the whole process of compression is reversible; therefore, the image can be recovered exactly.

GIF – This type of file type creates a table of up to two hundred and fifty six colors from a pool of sixteen million. For those images with fewer colors than 256, their images are rendered exactly. In case the image happens to contain many colors, the software which creates the GIF will use one of the many algorithms to approximate the colors in the image with the limited palette of 256 colors available.
It is also very crucial to note that this file type achieves compression in two ways. One of the ways is to reduce the number of colors of those images with many of them, thereby reducing the total number of bits that are needed per pixel. The second way is by replacing commonly occurring patterns with shorter abbreviations. For instance, instead of storing “black, black, black, black, black,” it just stores “5 black.” This file type is for those images with 256 colors or less. Images that contain more 256 colors are likely to lose up to 99.99% of their colors if GIF format is used.

JPG -This format is mostly used for photographs and other images with many colors. This is one of the file types which can achieve an astounding compression ratio and maintain higher quality images. Other formats such as GIF become so unkind to such images. JPG analyses the image then discards any information which the eye can’t easily notice. Unlike other files, its compression is adjustable and stores information as 24 bit color. At moderate compression level, your eye can not discern from original even at extreme magnification.

Does not include some various adobe product formats such as PSD, PSB, AI etc.

Continue reading